Password re-use… ah such a bad idea.
During a penetration test one of the most common vulnerabilities I see is the local administrators account having the same password used across all client machines in the estate, usually one for servers and one for clients. So a classic scenario I see a lot goes something like this; a vulnerability is identified in an environment lets say a nasty remote code execution, it gets exploited giving SYSTEM level privileges, you then dump creds from the box and boom you have the local administrators password, even if you don’t get the clear text password you might get the hash. You use the creds/hash with something like hydra or medusa to try a few more workstations in the environment, and hey presto your screen lights up with successful smb authentications. You now have the ability to move laterally across the network logging into workstation after workstation either dumping more creds with mimikatz or stealing tokens with incognito until you reach a domain admin account.
There are in fact a few ways in which we can contain or should I say slow down lateral movement by an attacker, one being to use a different local administrators password on every device, I’m going to walk through how we can achieve this using Microsoft LAPS (Local Administrator Password Solution). This essentially allows you set a unique local administrators password on every workstation in the domain. Thus stopping password reuse and pass the hash type attacks. Granted this is only half the problem solved however does shutdown this avenue of attack.
OK, how do we set this up?
A quick search on google for LAPS and you will find the free download from Microsoft.

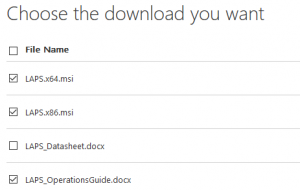
Go ahead and download the 32 & 64 bit downloads as well as the ops guide for reference.
For this demo I’m going to be using the trusty Blue Team Security lab in GNS3, you can see from the below diagram we have our Domain Controller and a few windows 7 clients to play with, great: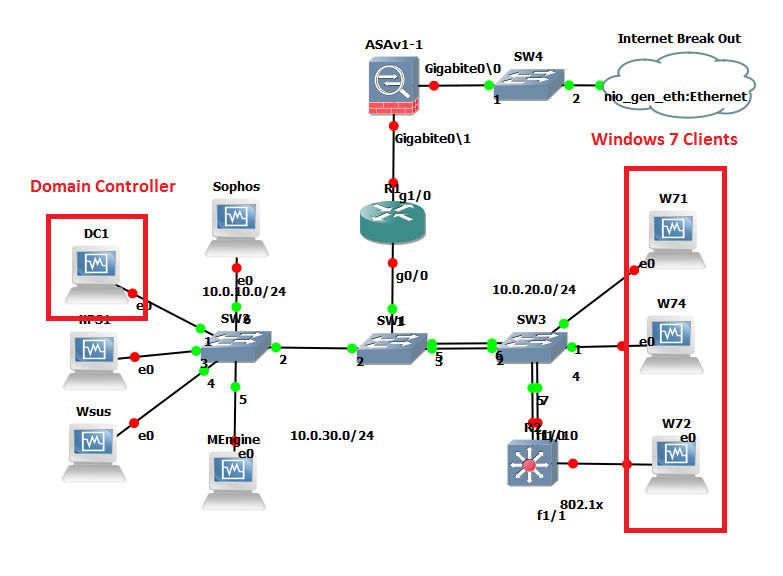
LAPS works by having what Microsoft refers to as clients and management computers within your domain. Passwords are stored in Active Directory as a computer object attribute this does mean that the password is stored in clear text. However transmission is encrypted. Management computers and its user will have the ability to fetch the password of any given client, so its important to delegate this responsibility carefully i.e to a specific security group. The msi we downloaded is the same for both client and management computers, the install has different options selected for each type. The default options being for clients. For the management computers I’m going to use ‘W71’ this is a standard Windows 7 Pro domain joined client. For the client computers we are going to use W74 and W72, again just standard domain joined Windows 7 Pro builds.
When we talk about management machines we are talking about user admin machines so where your helpdesk or second line staff can access.
There are a couple of pre-requisites; the first is a schema update which adds two new attributes to AD these are to store the password and timestamp for password expiry. The second are some permissions that need to be setup for our clients and the users that can see these attributes.
Let’s first install the management software and tackle the schema update.
On our management computer lets go ahead and double click on the msi in my case 64 bit so ‘LAPS.x64’
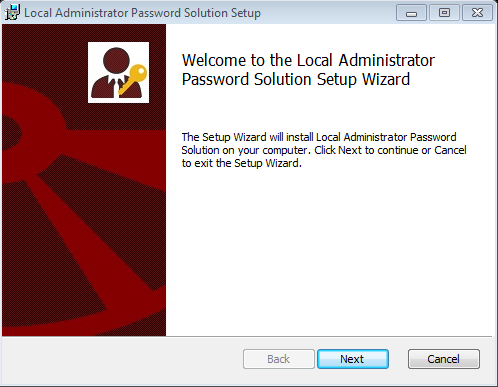
Click Next.
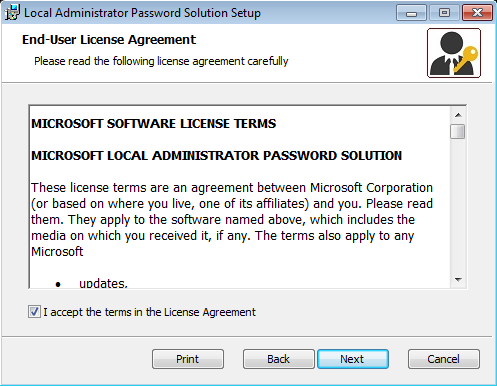
Accept the End-User License Agreement and click next.
Select the ‘Managment Tools’ and select to install to all the computer and click next.
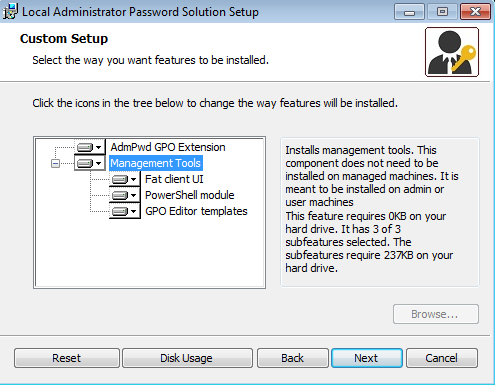
That it management install complete.
Onto our scheme update, open up an elevated PowerShell prompt with an appropriate scheme admin account, import the module and then update the schema like below:
Import-module AdmPwd.PS
Update-AdmPwdADSchema

Onto our permissions. Basically, the client machines need to be able to update the password and timestamp expiry attributes. Using the module that we have previously imported, or in the same window as before run:
Set-AdmPwdComputerSelfPermission -OrgUnit <name of the OU to delegate permissions>
In the Blue Team Security lab this would be on the ‘PCs’ OU:
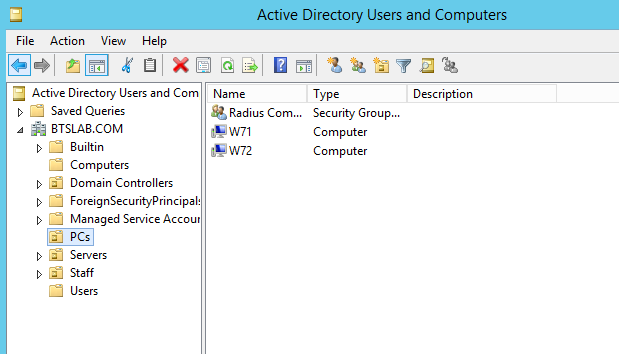
So the command would be:
Set-AdmPwdComputerSelfPermission -OrgUnit PCs

Next we will create a User Group that we can assign read permissions for the new attributes. This will essentially allow the new group and its users the ability to read the password field of the computer objects. In this case I have created a group called ‘LAPS Admins.’ The comand is:
Set-AdmPwdReadPasswordPermission -OrgUnit <name of the OU to delegate permissions> -AllowedPrincipals <users or groups>
In the Blue Team Security Lab our command would be:
Set-AdmPwdReadPasswordPermission -OrgUnit PCs -AllowedPrincipals ‘LAPS Admins’

The same again for the expiry field:
Set-AdmPwdResetPasswordPermission -OrgUnit PCs -AllowedPrincipals ‘LAPS Admins’

Managing clients; telling them we want to control their local administrator password is done through group policy. The policy we want to configure is a computer policy under administrative templates called LAPS, this will have been imported when the management computer software was installed. Using our management machine, in our group policy management console we want to create a new GPO under the container where our client machines are, just like below:
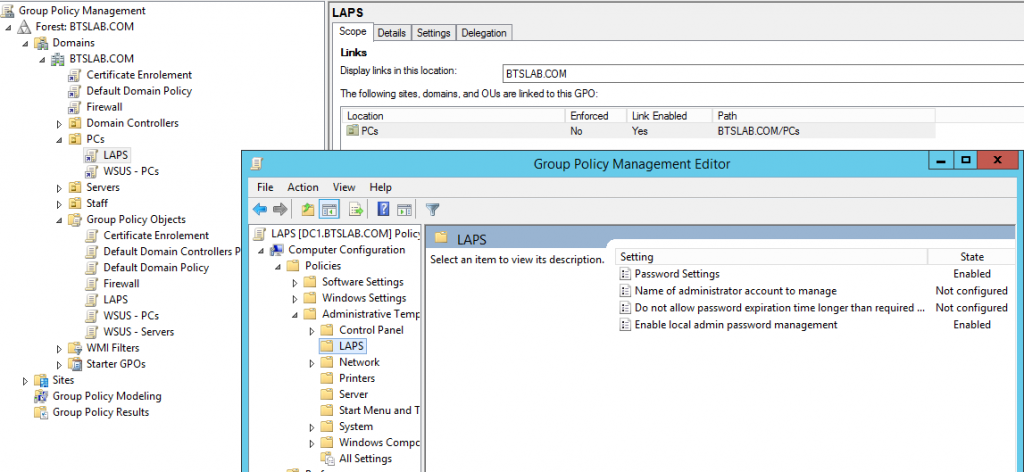
The settings we want to configure are to initial switch on the password management this is called ‘Enable local admin password management’ funnily enough and we want to enable it. Next is the ‘password settings’ this looks like, and has the below configuration options, as you can see we have a fair amount of control over the password to configure it securely. What you see below is the default settings:
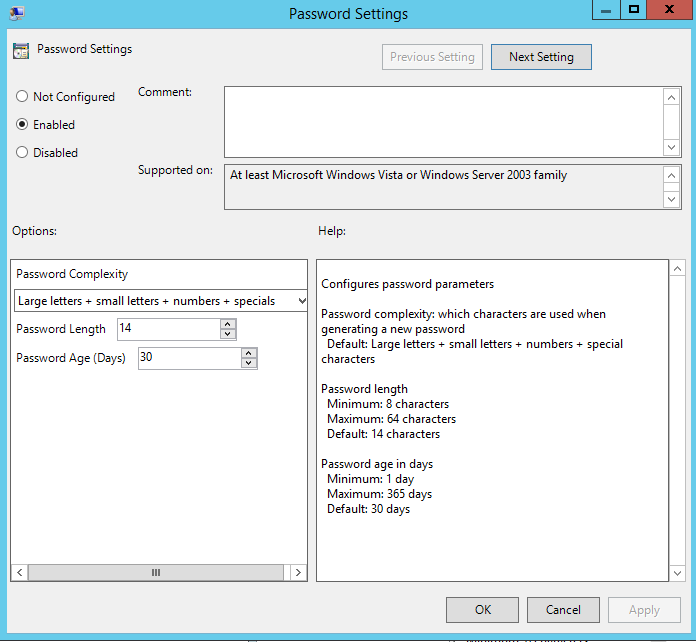
Its probably worth noting if you have changed the local administrators account name via policy (and you should!), then you will need to specify the new account name in the policy ‘Name of administrator account to manage’, enable the policy and specify the new name. This policy is only needed if you have renamed the account.
Next up is installing the client side software. I’m going to manually install this however in the enterprise you will probably use SCCM or GPO to deploy to your client machines. I will perhaps demonstrate this in my next post.
Over on our client the install takes all the default values from the same msi that we used for the management computers. I won’t bore you with additional screenshots, just know that it is a next, next, next, finish situation and installed successfully on my client machine W72.
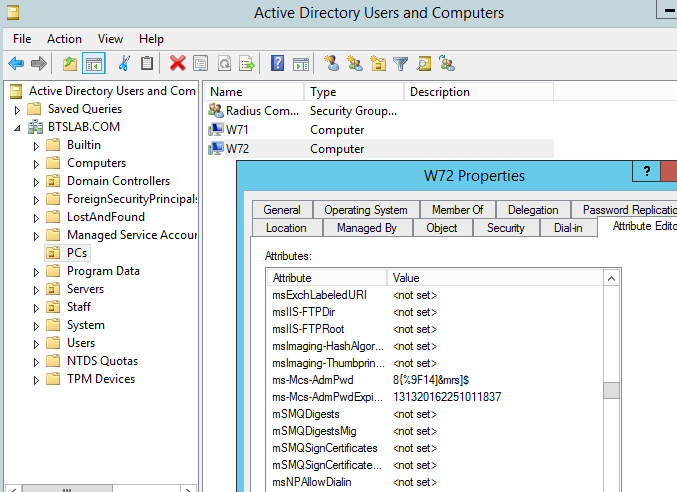
Once the above GPO has had time to take effect on our client machine we can verify the password in AD and through the fat client installed on the management computer. First in Active directory users and computers you can view the password by navigating to the computer object in question (W72 in this case) selecting the attribute editor and scrolling down to the value ‘ms-Mcs-Adm-Pwd’ this value is our new password the one below it is the expiry time (you will need to have selected ‘Advanced Features’ to view the attribute editor on the computer object) and be viewing with the appropriate rights (ie be part of in our case the LAPS Admins group):
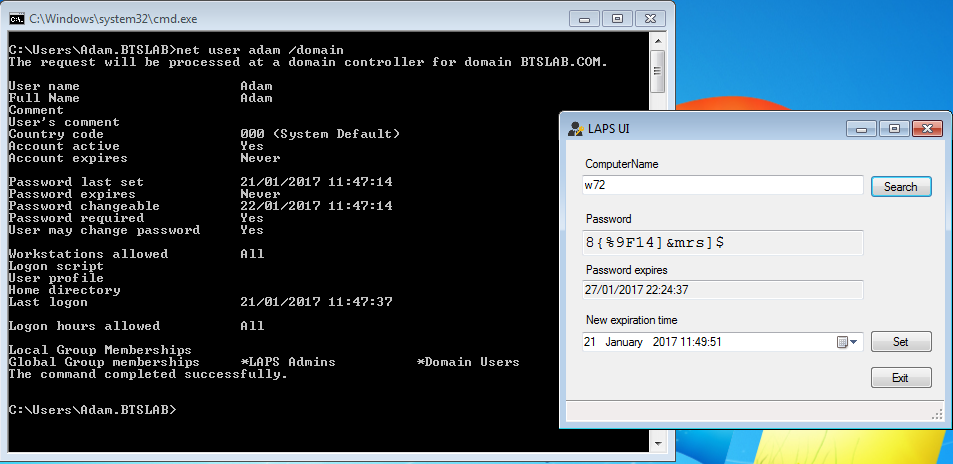
On the management machine with the account ‘Adam’ which is a member of the ‘LAPS Admins’ group through the fat client UI (which does require DotNet4).
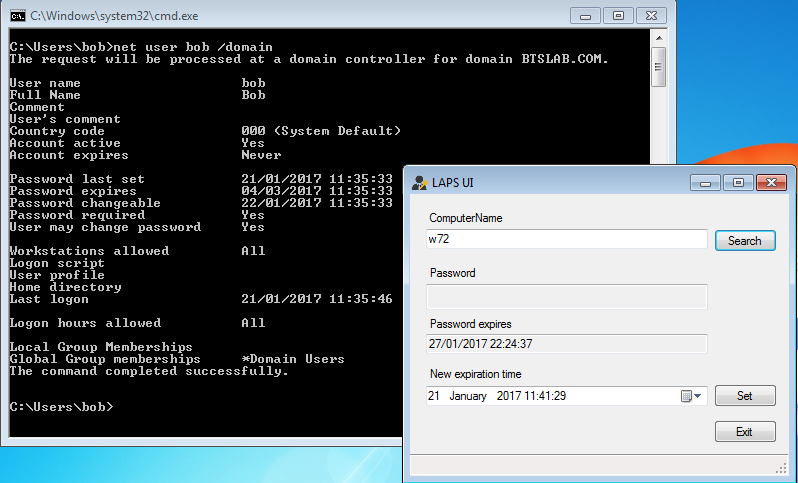
Just to demonstrate if we log in with ‘Bob’s account on the same management computer and try to use the same LAPS UI tool the following expected results are shown, not the bob is not a member of the ‘LAPS Admins’ group and so the password is blank, ace!
And for the die hard CLI users you can of course use powershell to retrieve the password with the appropriate account of course:

You can now try out your new unique local administrators password. Now even if the box has been compromised an attacker will struggle to crack the likes of the above password and secondly won’t be able to reuse the hash to authenticate to another machine. Remember to test out in your lab before in production. I hope this has been informative.
